Thursday, March 25, 2021

Every Picture Tells A Story, Don’t It?


 This one reminds me why I’m a happy guy.

I snapped this while I was at the little stretch of beach in Southport setting up a beach chair and some beach accessories for a product photo I’ll be using in an ad for the awesome little shop Boo & Roo’s in Southport Magazine. So that alone reminds me how lucky I am to be in the business I’m in. I get to go to the riverfront for work. I get to make photographs for work. I get to meet and become friends with people like Penny, who owns Boo & Roo’s, and her staff. It makes it easy to get out of bed in the morning, let me tell you. 

I’m also a huge fan of boats of all kinds. These huge freighters that come into the river on their way to Wilmington’s port are simply amazing. If you’re not familiar with what you’re seeing, all those multi-colored blocks on the ship are the backs of tractor trailers without the chassis, basically. So, yes, it’s HUGE. 

I also have a hard time resisting photos of people taking photos. I don’t know why, they just seem cool to me. And in this case, it reminds me what a great community we have. The woman here is just as likely to have been born in Southport as she is to be a tourist. Locals, many of them, flock to the waterfront to watch the ships come in every bit as much as the visitors to our area do. A love of the sea and the ships that travel her is common among our locals. 

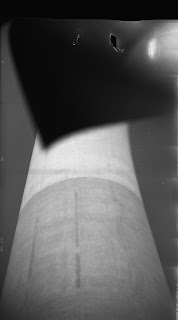
The tower on the left of this image is River Pilot tower, used (or at least it was used) to watch for ships waiting to enter the river and waiting for a pilot to guide them. It’s just one of the things that make our community different. How many people have a river pilot pilot tower in town? Or a lighthouse? These serve as constant reminders that we were wise in our choice of home. And they make great photo subjects, which is a bonus for me.


Sunday, March 21, 2021

ISO, Grain, and My Collection of New Film


When I decided to try to get the folding Brownie working, I ordered a 5-pack of Kodak Tri-X 400 B&W film. I figured five rolls would give me a good shot to see if the camera was viable or not and Tri-X is pretty much the standard in the US for black and white film. This is the film stock used by nearly all photojournalists back before the digital age, so it’s “look” is one we are all familiar with from newspapers. I thought that would be the best film to judge how the camera was working because I knew what it should look like. I believe that worked and that I now know that that old camera can, if I get everything right, produce great images. 

Now it’s time to branch out. One of the fun parts of film photography is working with different film stocks that all have different properties, some slightly different and some vastly different. The range of films in black and white isn’t nearly what it is in color, but there are still differences in tone and contrast and grain that can be fun to play around with. 

So, I went to B&H and found four different films that were all among the cheapest on the site. I don’t want to break the bank and seeing as I’m not using anything approaching state of the art, why not embrace that and go as simple as possible? I also wanted to try out different ISOs to see if I could get good exposures using my kind of guesswork light metering system and the Brownie’s limited options. 

The 400 ISO Tri-X I started with is a great all-around film speed that can handle both bright sun and even indoor artificial light. If you’re not familiar, ISO refers to the film’s sensitivity to light. The higher the ISO (sometimes called the ASA), the more light-sensitive the film is and the less light is needed to get a good exposure. Higher ISO is also called higher speed. The nomenclature is confusing at first, but it means the same thing, higher number equals able to shoot in lower light. 

The trade off is grain, the kind of chunky look that a print or scan of an image has, making it look like it’s made up of a ton of little dots. Grain can be big or small and rough or smooth and it is one of the huge differences in different films. Grain is not necessarily a bad thing. A lot of photographers add grain to their digital images in Photoshop or Lightroom. There’s a slider right there just to do that. It makes an image look more.....artistic, maybe? More “real”? Which is kind of ironic as it actually makes the image look less like the thing the camera was actually aimed at in the real world. But we are used to seeing grain in photographs, so to us, or many of us at least, it belongs there. Anyhow, often cheaper films are grainier, and higher speed (higher ISO) films are grainier. 

The films I chose are Arista Edu Ultra 100, Arista Edu Ultra 400, Holga 400, and Foma Creative 200. These each cost about $5 versus the more than $7 for each roll of Tri-X. I thought I had three film brands and four different rolls. Turns out all the film I bought is made by Foma, the Czech company I talked about in the last blog post. It’s just different packaging. I don’t mind, except that I really have three different films as the Holga 400 and Arista Edu 400 are the same thing. But no biggie, I’ll have fun with all of these and look forward to seeing the results. 


Thursday, March 18, 2021

Second Try At Home Developing

This one didn’t turn out as well as the last, sadly. I shot a roll of 35mm black and white with the Vivitar V2000 to have something else to develop, mostly. I wanted the practice. Also, I thought it would be fun to play around with different types of film and see how they differed. This one was Fomapan 400 Action film from the Czech Foma company. They’ve been around for 100 years making various types of film, from consumer camera film like this to specialized medical film. I can’t blame the failure on them


We were out and about a couple Saturday’s ago and I thought a local state historic site, Brunswick Town, would make a good subject for monochrome photography. There are ruins, including the walls of a big brick church, that I thought would be fun to shoot. It was a great spot, and we’ll go back and try again for sure. 


I’ll start out with the most successful image from the roll. This turned out much as I’d hoped and the fogging and stray chemical marks that plague most of the other shots aren’t so noticeable here. It’s foggy, to be sure, but not awful. 


Here is a less successful image. The fog is bad and there are what I think to be shadows of the film itself on here. I am pretty sure I screwed up loading the film on the reel. I think some of it overlapped and was touching during the developing process. I was fumbling around in the dark trying to get it on right and I suppose I failed. Surprisingly, it turned out to be more difficult than the 120 film, which is the opposite of what I’d read was the case. But who knows, I’m just clumsy. Practice will make perfect.

I’m not too upset with this photo of Lisa either. I cropped out a bad stain and what’s left is pretty ok. This film has a very noticeable grain, but how much of that is native to the film and how much is due to my developing process, I don’t know. I’ll have to try some more and see. 


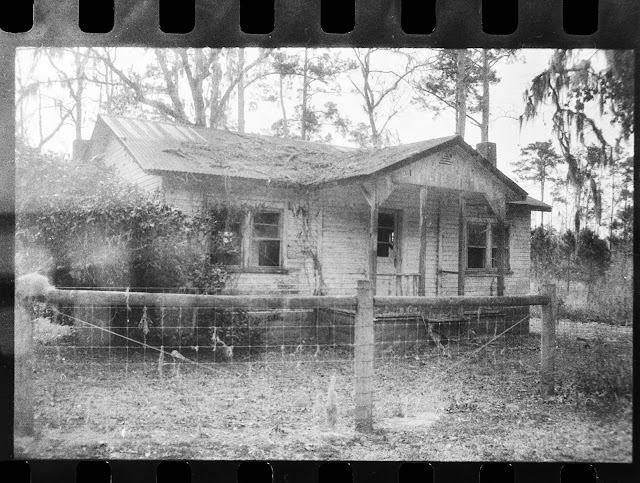
This one of an old house up the road from the historic site is pretty cool even with the fogginess. I might be able to pass it off as intentional and artistic. It makes it look kinda spooky for sure. 

In the end, I’m not upset at the results. Mistakes are learning experiences and the film was very affordable. It was a good one to screw up on. The next roll through that camera is going to be Kodak’s professional grade TMax at a 100 ISO. I’m curious to see the differences ad a bit worried about rolling the longer 36 exposure roll onto the spool. We’ll see. I also have Foma film on the way in 120 for the Brownie. I’m excited to compare how it looks with the Tri-X I’ve shot thus far. Here’s hoping the sun comes out someday and I can get out and shoot some more soon.

Saturday, March 13, 2021

Home Developed Brownie Photos

I really couldn’t be happier with these. The magical alchemy of fumbling in the dark with getting the film on the reel, pouring in the chemical and shaking it around just enough but not too much, rinsing it for what feels like eternity and then pulling it out and seeing actual real GOOD images is just awesome. I got five images out of this roll, which is an improvement. The first one is borderline edge of the film, so maybe another half turn of the spool there. There’s enough space between images that I think I could turn less and squeeze a sixth frame out of the roll, but that will be tops. Here’s what I ended up with from a stroll around Southport on a beautiful Thursday afternoon. 


 I found this classic parked next to Southport’s Garrison House with the owner, in a matching sweater, sitting on the lawn next to it soaking up the sun. He loved the old camera and said he’d had one very similar to it before his wife sold it at a garage sale. You can see on the left what. Think is the very beginning of the film, I think it’;s the tape holding the film to the paper backing. My light leak is on the top left, but I’m increasingly leaning toward not worrying about plugging it. I set the focus to 8 feet and erred a bit toward over exposure and I think it worked well. I’m terrible at getting a horizon straight on my modern camera, even with a digital level showing, so I think getting a non-tilted photo out of this camera with a waist-level viewfinder that’s clouded with age is simply not in the cards. We’ll call it artistic. 


I have been hesitant to take two images of the same subject since I have so few frames available, but I wan’t sure the first was actually on the film, so I shot this of the iconic tail fin. I ended up with a cool reflection in the immaculately clean paint job and a nice sun flair on the fin. Again this was set to 8 foot focus and I guessed how far away I was. I’m blown away by how sharp a 100 year old lens can be especially with focus being so much guesswork. 


This is the least successful image of the lot, but I kind of expected that. First off, I forgot to move the focus up from 8 feet to 25 feet, which turned out to be less of a problem than I expected. Also, I was shooting holding the camera above my head over a wall to get what I hoped was a good angle on this historic home’s porches. The entire image is a bit foggy, which must be due to something at the time of the exposure rather than developing because it’s only on this frame. Southport architecture photography will take some more work. Maybe I’ll dedicate a roll to just that soon. 


This is one of the boats in the double exposure I took on the first roll. She’s a refurbished fishing boat now serving as a cruiser and she’s gorgeous. My light leak is not causing any real trouble and the focus was set to a proper 25 feet. Again I’m so happy with the performance of this old lens. Also, the contrast is nice with detail in both highlights and shadows.


Here’s the last shoot, a shed used by the folks who own the nearby slips. This one might have been a little more exposed and been better, but I can likely mess around with it in Lightroom until I love it. Even so, I am really pleased with this, another 25 foot focus. I included too much gravel and cut off the top of the roof because the viewfinder doesn’t quite match either what the lens is seeing nor the size of the film. But that will just take practice to noodle out. 

All in all I’m super happy with these. This old camera doesn’t just work, it looks like it’s capable of capturing truly great images. The challenge will be working out the quirks of the viewfinder and the winding of the film. 

As far as the developing, I nailed it if I do say so myself. I don’t feel like I lost anything by going with a one-step developer rather than the traditional multi-chemical process. The TriX film I’m using performs great in this camera. I have several different brands and speeds of film on the way, so we’ll see how they work, but 400 speed might just be the sweet spot. 

Next, I’d like to take more close (8 foot focus) shots and work on some portraits of the Lovely and Talented Lisa. Stay tuned :-)

Thursday, March 11, 2021

Setting Up A Home Darkroom

While I was very pleased with the service from The Darkroom, it made it clear to me that I am way too impatient for mail order developing. Also, I found out that my camera takes super panoramic photos and that there is a $10 per roll surcharge to develop and scan these, so that makes each roll almost $25 all in to get developed. It’s worth noting that The Darkroom processed my photos without the extra 10 bucks, they just included a note with the negatives they returned asking that in the future I pay for that service. It really is a great outfit and I’ll be sending any color film I shoot to them in the future. But the fact remains that $25/roll and a two week wait is not ideal. 

The other option is Do It Yourself. I’m not entirely new to developing film hair learned in high school and continued in a college photojournalism class, so I figured I could noodle it out. The first thing I needed was a dark room. Imagine that. The film needs to be taken off the roll and put into the developing tank in complete darkness. They make bags with light tight arm holes for this, but I’m lucky to have a downstairs bathroom that can be made pretty much completely light tight. 

Paterson Tank and FPP Super Monobath Developer

The equipment needed for home developing is fairly simple. I bought a developing tank, I bought a small Patterson Tank for around $35, and then a funnel and thermometer. The tanks come in a bunch of sizes and most come with the reels that the film gets wound onto. Mine can hold one roll of 120 film or two rolls of 35mm, and came with reels that adjust to fit either size. The thermometer is important and the temperature of the developing chemicals matters. A normal kitchen one isn’t ideal as the temps we’re going to be dealing with are much lower than cooking temps. The one I found on Amazon was sold as a darkroom thermometer but still cost less than $15. The funnel is just for pouring chemical out of the developing tank and back into its bottle when you’re done. 

I did a little research into developers and found that there is a huge variety. I can’t remember what we used  in school. Normally you’d need a developer and a fixer, but the Film Photography Project sells a One Step developer that combines both the developer and fixer into one solution. The advantages are simplicity and speed, and temperature matters much less than normal. The drawback is less control over how your film is developed. For a beginner, though, it is ideal. The one liter bottle costs $19.99 and is good for about 15 rolls of film, they say. 

That’s all you need, really, to turn the film in your camera into negatives. You’ll want to do this with access to hot and cold running water, so I just stayed in my bathroom darkroom. 

The process is simple. Go into the dark with your exposed film, carefully wind it onto the reel (this takes practice), put the reel in the tank and screw on the lid, and then you’re ready to turn on the lights. You rinse the film in water about the temp of the developer (about 72 degrees in my case) for five minutes and pour it out. Then in goes the One Step. You agitate the tank for 30 seconds and then an other 5 seconds every 30 seconds for the full 5 1/2 minute developing time. Then the developer goes back into its bottle (using your funnel) and you rinse again, this time for 20-30 minutes. They sell a special chemical that cuts this time down to 5 minutes and as I a truly an impatient person I plan to buy some. 

Then you take the film out of the tank, squeeze extra water off it and hang it top dry. It took about two hours for me. 

That’s it. Now you have negatives ready for scanning or enlarging. I’ll talk about how I scan these using my DSLR in another post. The scanners used to scan negatives are pricey so I find this kind of poor man’s set up to be a perfectly acceptable alternative. 

One of my finished products! 


Monday, March 8, 2021

Back To The 90s

 The idea of developing my own film left me wanting to try out some 35mm as well as messing around with the old Brownie. I mean, if I can develop it myself, and scan it in easily enough, I might as well. So I dug into the closet and pulled out the Vivitar V2000 my parents gave me as a high school graduation gift. This is the camera that served me well through my college Photojournalism class and the camera that took all our pictures of John as a little guy. The negatives I’ve been practicing my camera-based scanning on came from this camera. It’s not fancy, it’s the basic camera from a company that wasn’t at all known for cameras, but it holds a lot of memories for us. 

I’m starting out with black and white developing so I ordered two roll so B&W film to try out. I looked on B&H and found the cheapest roll I could find and ordered it up and then found Kodak TMax, a step up in quality from the Tri-X I put in the Brownie. 

The cheap film is called Fomapan profi line Action and it’s a 400 speed ISO made by a Czech company called Foma Bohemia Ltd with a history in film going back 100 years. THey claim their film to be fine grain and perfect for all-around uses. The Kodak TMax I got is 100 speed and promises “the finest grain”, so we shall see. 


The camera itself is, as I said, very basic. It has a light meter, a little red plus or minus or green circle that light up to tell you if you’re over, under, or properly exposed. I’m not sure how well it works. It’s the only part of the camera dependent on the battery and I can’t remember ever putting a new battery in. It lights up still, though. The lens is a 35-70mm zoom that claims macro capability. The glass is clean and the shutter seems to be working right. LAst I used it it worked just fine and I have no reason to believe anything has changed.

This past weekend we met some friends at Brunswick Town historic site near here and I shoot the roll of Foma since it was a cloudy, overcast day. It took longer than I thought to go through the 24 frames. In the same place under the same circumstances I’d have taken probably more than 50 photos with the digital camera, but knowing i only had 24 frames, i was more choosy and it led me to leaving Brunswick Town with a few shoots left. We went up the road a I shot an old home off the side of the highway and then ran through the rest at the park while walking the dog after we got home. 

I apparently hadn’t rolled the film all the way back into its canister so I exposed some of the roll where I opened the camera to take it out. No huge loss as I was just testing the camera and mostly seeing if I could still develop film well. I do need to learn to be more careful and get a better feel for when the film is all rolled up, both on this camera and the Brownie. Thus far, I’m lousy at that part. 

Hopefully the developer and PAtterson tank arrive today and I can open my Stites Fotomat soon!


Sunday, March 7, 2021

It Worked!!!!!

The first photos from the Brownie have been developed. 

First off, it worked. That’s the big take-away and the part that makes me really happy. Beyond that, I learned some valuable lessons about HOW the camera works and what I might do going forward to get the best images out of the old girl. (Side note: I feel like this camera needs a name.) But, again, the exciting thing is that this 100 year old camera can capture some terrific images despite all the limitations and challenges. 

The processor was bale to get two photos off the first roll and four (well, three and a half) off of the second. Much of the learning process is going to be figuring out how to load and wind the film to get the most use of the roll. This camera shoots in a very panoramic format. The negatives are 6mm high (the width of the film) and 11mm wide. I think, after a little quick measuring of the negatives I got back, ideally there are a possible six images on each roll. I need to find a way to nail down how to get the very first frame lined up. That will be the tough part. Then it’s just a matter if how many turned move the film along properly between images. Having exposed negatives to work with will be a help there. 

Beyond that, I can go though each image and see what went right and what went wrong and take some lessons there. 


This is the very first one, and not terrible given that fact. I was under the Oak Island pier on a sunny day, which I know can look very cool. Tis I that have been a bit tricky of a situation for this camera, though, with deep shadows and bright highlights. I used a phone app light meter and went with the f22 at 1/100th that it recommended. That was not enough exposure. I should have opened it up to f16 and I might have gotten some detail in the pier. I at first thought that the light at the upper left was bright sun coming in, but looking at the rest of the photos, I see that I have a light leak of some sort. Not sure if I should try to fix it or accept it as adding character to the photos from this camera. I am really pleased with the detail in the sand in the foreground though. Very hopeful of what this camera could be capable of.


This is an accidental double exposure caused by my forgetting to wind the film between two shots, both of boats. The light leak is evident again, but doesn’t ruin the shot. I’m happy with the exposure here and think the first image, the boat facing away from us in the photo, would have been a pretty spectacular photo if I had wound the film. But the more I look at the double exposure, the more I kind of like it. 


I didn’t wind the film enough on this roll at the beginning because this is the first image of the second roll but the second I took. This is the wall at Veterans Park near our house. I used the mid-range focus here and meter reading from the app. Everything worked pretty well here. The exposure is good, the focus is good, even if it does fall off a bit on the edges. I think that is a function of how the film sits since it’s not quite wide enough to sit on the frame inside the camera the way 116 film would. But the focus on the center emblem sis spot-on, which is amazing for a 100 year old lease focused by guessing distance. The contrast is cool, too. One thing that is really tricky is getting a straight horizon using the viewfinder on this camera. We’ll chalk that up to “character” too. 


I think the winder wasn’t catching the take up reel properly on this roll. I didn’t forget to wind between shots, but still ended up with this double exposure. Again, I think the portrait of Lisa here would have been really good. Makes me want to try that again and see what happens. 


This is far bad away the best of the lot. This is the image that makes me want to keep at it because it is absolutely cool. I used the “infinity” focus and it did a great job of keeping the lighthouse sharp. The exposure is spot on again and the detail in the shadows is great. It’s not even too off-kilter, really. I got the rail as a leading line. The super pano aspect ratio lends itself splendidly to lighthouses! I rested the camera on the rail to minimize shake, which worked well. Looking for a spot to do that might be key to getting the sharpest images as such a slow shutter speed. 


Here’s the end of the roll. 

So there we are. I’ve since shot another roll and it’s still in the camera waiting for my developer kit to arrive. I loved The Darkroom, the processor who developed and scanned these for me, but it simply is too big an investment in money and time given what I think will be the relative ease of home developing.

That will be another adventure, though.


Wednesday, March 3, 2021

So What Makes A 100 Year Old Camera Different?

 The process of capturing an image is mechanically very simple. A shutter opens and allows the light reflected from a scene to hit a sensor that can translate that light into an image. Today's digital cameras us an electronic sensor, the previous generation of cameras use film and before that treated glass was the sensor, but in the end it is the exact same process. 

The variables are the same today as they were in the first days of photography. The amount of light entering the camera is controlled by the size of the hole made by the shutter and by the length of time it remains open. The sensitivity to light of the sensor (be it film, glass or electronic) is the third variable. That's it, the Exposure Triangle, the interplay between time, hole size (called aperture) and sensitivity (measured in ISO today). 

All the settings you’ll need
My fancy new Canon EOS-R digital camera allows me to pick the ISO, or sensitivity of my sensor. Film cameras are limited to the sensitivity of the film selected, but there is a wide range even today when few companies are making film. That part of the triangle is no different with my Brownie than it is with the Vivitar I used in college. 

Shutter speed is pretty simple as well. The EOS-R can snap off a shot in 1/8000th of a second or keep the shutter open as long as I choose. Here is one big difference that technology has brought us. The Brownie has three entire shutter speeds- 1/25th, 1/50th and 1/100th of a second. It also has a B mode that leaves the shutter open as long as the shutter lever is held down and a T mode that opens it on one click and closes it on the next. 


On the left here are the shutter speeds: 25, B, 50, T, and 100


Aperture is a function of the lens, so the smallest and largest openings vary with which lens I use for the EOS-R. The Brownie does not have an option to switch lenses, so the aperture range is fixed, in the case of this camera between f32 (the smallest hole) and f8 (the largest hole). One fun thing I've taken advance of is that on the Brownie the aperture selector is a simple lever that doesn't necessarily need to stop at one of the stops printed on the camera. Another fun thing is that Kodak before the 1930s didn't us f-stops to measure aperture, they used the US system, which is very close and looks like the f-stop numbers I'm used to seeing, but really isn't. I easily found a translator online and have pretty much memorized which is which already, so it isn't a huge problem, just a little quirk.

The apertures in the US system. To help out, Kodak has provided descriptions of the conditions under which one might use each setting. I love that there’s a “Marine” setting. 
 

The effect of these differences is to narrow options. I've heard people smarter than me say that the slowest shutter speed one can reliably hand hold and keep things in focus is 1/250th of second. So my 1/100th is a bit iffy even if my hands are unusually steady, and the other two slower speeds definitely require a tripod. One interesting thing that has NOT changed in 100 years is the thread size of tripod heads, so my modern tripod fits this old thing perfectly. But for normal, not lugging around a tripod, circumstances, it's 1/100th or nothing.

That leaves aperture as our only option to control exposure. I've used 400 ISO film, which is pretty much middle of the road, and on sunny days it's been right about f16 or f11, depending on shade. without a light meter on the camera, I'm left to use a photo app or the Sunny 16 Rule (which deserves its own post, I think). Theoretically I should have some fairly decently exposed images on the three rolls I've shot, but we shall see when they get developed. 

Once you get the exposure correct, it's time to focus. I will admit to being spoiled by autofocus, but this lens doesn't really have a manual focus either. Focusing is accomplished by slight adjustments in the distance the bellows and lens assembly extend. There are marks for 8 feet, 25 feet and 100 feet. You just guess which one is closest to what you're looking at and pray I guess. Again, we shall see. The relatively small apertures will tend to give a larger depth of field (more of the scene will be in the same area of focus) so maybe it will work out ok. 

Here’s the super-helpful focusing system. Just always be 8, 25 or 100 feet from whatever you’re shooting! 

The last big difference with this camera doesn't so much affect the process, but requires some work to overcome. The film type used in this camera, 116, hasn't been produced since the 1980s. It's a medium format film, and is not so far off from the 120 size used in today's medium format cameras. All I needed to do is buy some little 3D printed spacers to make the smaller 120 reels fit in the space meant to hold 116. It makes loading the film an adventure, though. 

The spiffy spacers that make modern film fit in the 100 year old camera

I've frankly loved shooting with this camera. The lack of options is actually kind of liberating. My first camera had a light meter, but it required batteries and I had no idea, so I didn't even know it was there. So I've had a good grasp of the exposure triangle and figuring out settings in my head for a while. It came back like riding a bike, thankfully. So without worrying too much about that, you only have to think about what you are shooting. It's fun and a great way to understand what is happening behind the scenes of modern cameras (or phones for that matter). 

Of course all of this may become much more frustrating if the film gets developed and looks terrible. I can't wait. 

Russian Spy Film

 No, I don’t mean a Russian version of 007, I mean photographic film designed by the Soviets for aerial surveillance, aka spy planes. I love...